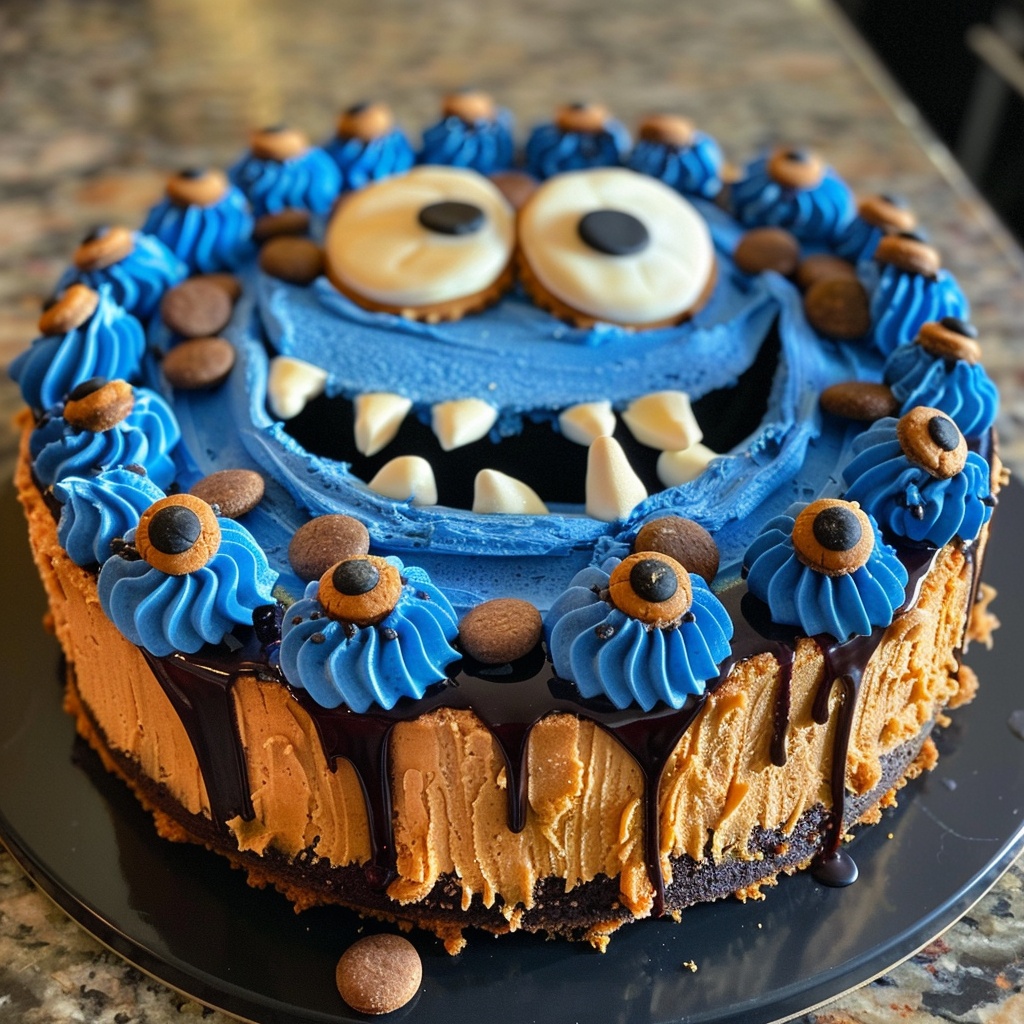
This fun and creative Cookie Monster Cheesecake is a guaranteed hit for any occasion! With its vibrant blue frosting, playful decorations, and decadent cookie-filled layers, it’s as delightful to eat as it is to look at. This cheesecake is rich, creamy, and packs a flavorful punch with its combination of cookie crumbs and silky-smooth cheesecake filling. If you love cookies and cheesecake, this monster-inspired dessert is a dream come true!
Why You’ll Love This Cookie Monster Cheesecake
The Cookie Monster Cheesecake is not just visually striking but is filled with layers of texture and flavor. From the crumbly cookie crust to the creamy cheesecake center, every bite offers a sweet adventure.
- Fun Presentation: The Cookie Monster theme makes it a great option for kids’ parties or fun gatherings.
- Rich and Creamy: The cheesecake filling is smooth and decadent, perfectly balanced by the cookie crust.
- Easy to Decorate: You don’t need to be a pro baker to pull off the look; simple piping and fun decorations bring this monster to life!
- Cookies Galore: With cookie pieces inside and on top, it’s a cookie lover’s dream come true!
Whether you’re throwing a themed party or simply craving a sweet treat, this Cookie Monster Cheesecake is guaranteed to bring smiles all around!
Ingredients for Cookie Monster Cheesecake
For this recipe, you’ll need some standard cheesecake ingredients as well as a few items to give it that fun, Cookie Monster flair! Here’s what you’ll need:
- Cream Cheese: Make sure it’s softened to room temperature for a smooth filling.
- Sugar: Regular granulated sugar to sweeten the cheesecake.
- Eggs: To bind the cheesecake filling.
- Vanilla Extract: Adds depth and flavor to the filling.
- Heavy Cream: To make the cheesecake extra rich and smooth.
- Oreo Cookie Crust: Crushed Oreos form the base of this cheesecake for a classic cookie flavor.
- Blue Gel Food Coloring: To transform the cheesecake and frosting into that signature Cookie Monster blue.
- Mini Chocolate Chips: Folded into the cheesecake batter for bursts of chocolatey goodness.
- Butter: Used in the cookie crust to hold it together.
- Whipped Cream: To decorate the top with fun swirls, colored blue to match the theme.
- Chocolate Cookies or Candies: For the eyes, teeth, and other monster features.
How to Make Cookie Monster Cheesecake
While the decorations might steal the show, the real magic happens in the cheesecake preparation. This cheesecake is simple to make, and the result is a show-stopping dessert with plenty of cookies in every bite.
Step-by-Step Instructions:
- Prepare the Oreo Crust:
- Start by making your cookie crust. Pulse Oreo cookies in a food processor until they turn into fine crumbs.
- Mix the crumbs with melted butter, then press the mixture into the bottom of a springform pan to form an even layer.
- Bake the crust for about 10 minutes at 325°F. Let it cool while you prepare the filling.
- Mix the Cheesecake Filling:
- In a large bowl, beat the softened cream cheese with sugar until smooth and creamy. Add the eggs, one at a time, followed by the vanilla extract and heavy cream.
- Gently fold in mini chocolate chips for that extra cookie bite!
- Add the Cookie Monster Color:
- For the iconic Cookie Monster color, mix in blue gel food coloring until the cheesecake filling reaches the desired vibrant blue hue.
- Bake the Cheesecake:
- Pour the cheesecake filling over the cooled crust. Tap the pan gently on the counter to release any air bubbles.
- Bake the cheesecake at 325°F for 50-60 minutes or until the center is set but still slightly jiggly. Let it cool completely before decorating.
- Decorate the Monster:
- Once cooled, top the cheesecake with blue whipped cream swirls. Use white chocolate discs or candies for the eyes, black candy pieces for pupils, and white chocolate chips for the teeth.
- Add extra cookie crumbs or mini cookies to finish off the Cookie Monster look!
This fun and delicious Cookie Monster Cheesecake will surely be a hit at your next party!

